
If you've ever poured your heart into creating something beautiful...only to feel a little bit stuck or scattered when it came time to share it with the world, this one's for you.
As someone who's been running multiple creative businesses for over a decade, I've launched everything from handmade collections to digital downloads, product collabs, and services.
At this point, I’ve executed nearly 100 launches, and while every one is different, I’ve built a system that helps me feel calm, confident, and actually excited each time I release something new.
But it wasn’t always that way!
Before we dive in, just a quick note, if you're gearing up for a launch and want a little extra support, be sure to grab my Free Launch Checklist at the end of this post. It's a simple digital guide to help you stay organized and confident every step of the way!
A quick story for you…
I still remember launches from my first years in business where I completely underestimated how long the prep would take. Or the amount of content pieces/photos I'd really need to make it a success.
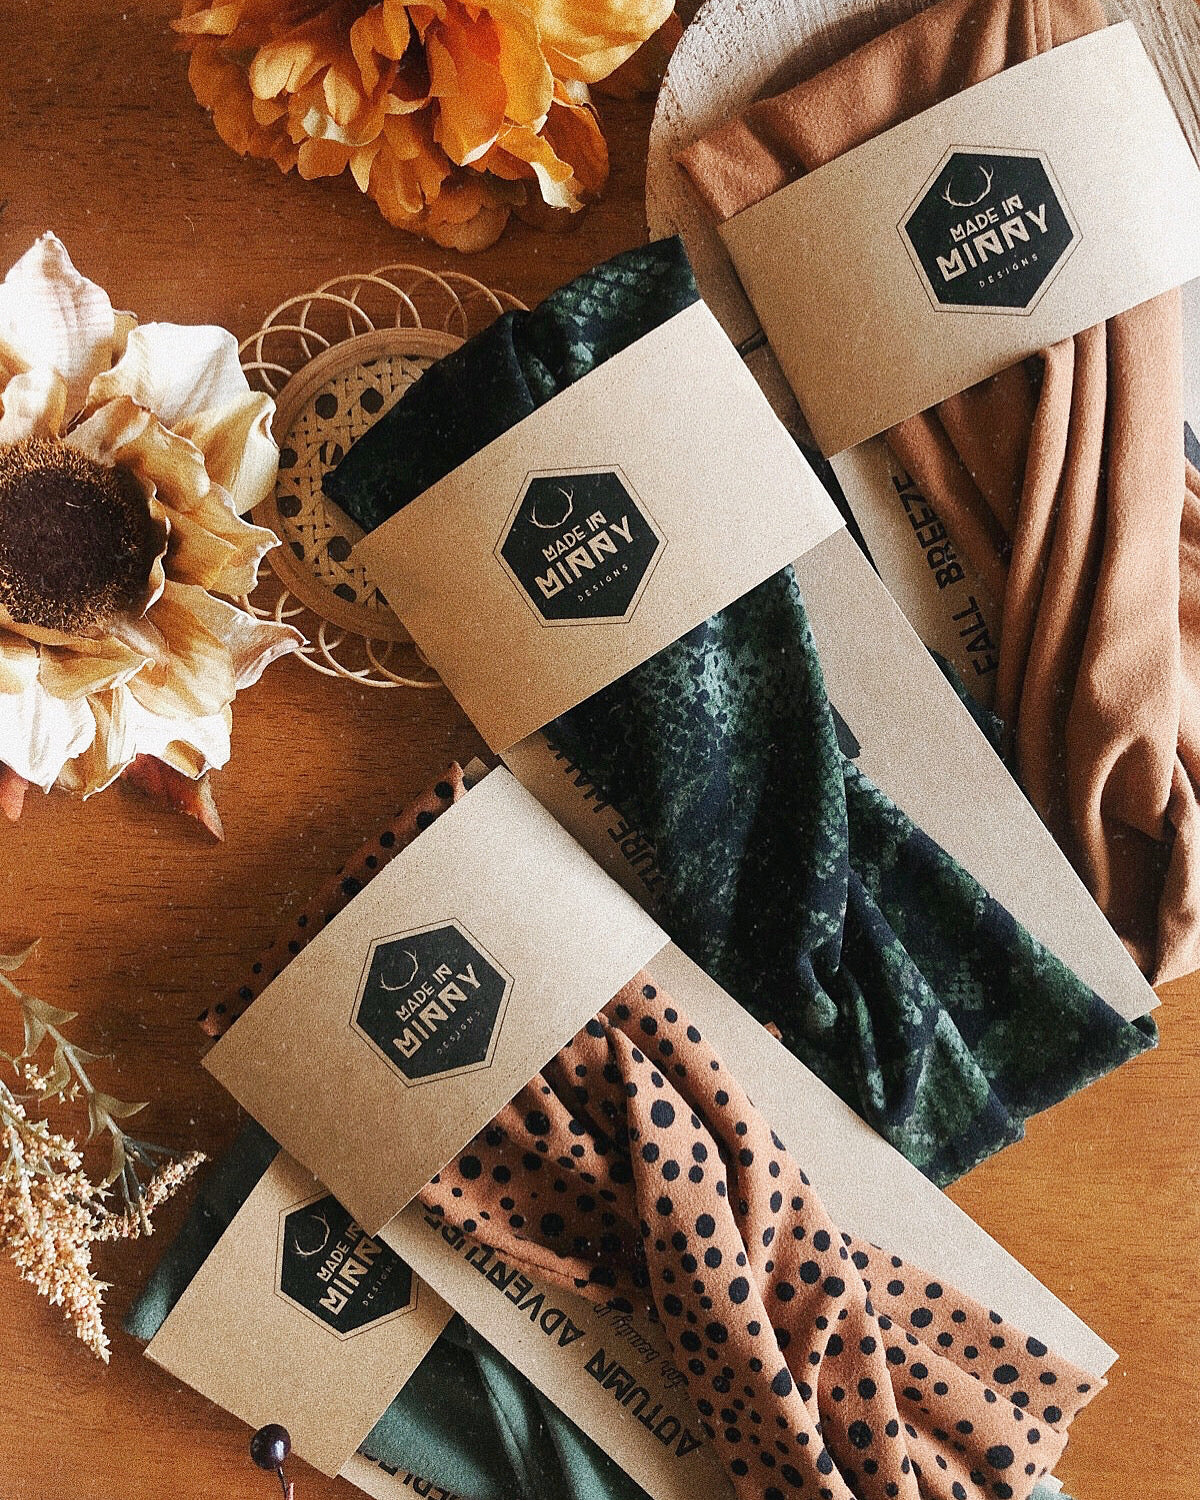
I had a new collection of handmade items I was proud of, but I hadn’t thought it through much beyond flat lay photos & a couple instagram posts.
Let’s just say… I quickly realized that was the bare minimum.
But also...the problem wasn’t my product!!
The problem was my plan.
I knew I needed more of a set a process for launches, something repeatable, so I could stop wingin' it and actually enjoy launching.
Not only that, but be confident that I'd have sales rolling in as soon as my new products went live!
There's SO much detail that goes into designing, crafting, and packaging handmade products.
And they 1000% deserve more than just a couple stories and posts on your feed.
And trust me, you're not annoying when you share your art. I encourage you to share it everywhere, and then share it again.
Take up space, sister!
Whether you're releasing your latest collection, a pattern, restocking your best sellers, my tried & true steps below will help you feel organized and set up for launch success.
So let's get into this & get you set up for success on your next launch!
Breaking Down the Art of the Launch

1. Pre-Launch Prep (the most important part!)
✦ Product Development & Finishing
Give yourself the breathing room to create... you really can't rush creativity.
From the first ideas to the finished product, you want your pieces completely ready before you dive into photos and listings. It’s so much easier to plan the rest when your products are fully done (ask me how I know 😅).
Tip: Finish your products fully so they are ready to ship! That means adding tags, weaving in ends, get them in their packaging so have minimal work once the orders start rolling in!
I've tried made to order, and it works well for things that take under 30 minutes to make & finish, but beyond that, in my experience it can get a little stressful.
✦ Timeline + launch date
Pick your date at least a few weeks to a month out!
That gives you time to pace yourself, rather than rushing everything in a couple weeks. Trust me, everything takes longer than you think... and launching while feeling stressed is not fun!

✦ Photoshoot
Good photos = more sales!! Whether you’re snapping pics in your home office or working with a photographer, schedule your shoot with plenty of time. Keep in mind edits, delivery windows, and that life happens...build in a buffer.
Tip: Go beyond the flat lay photo! Show the product being worn.. it helps SO much with sales. People like to envision themselves wearing or using it. Here's a post you can save with 18 photo ideas to showcase your handmade products!
✦ Website refresh
Think of your website like a physical storefront. When you walk into your favorite store and see a fresh setup, seasonal displays, new signage, it feels FUN & intentional!
Do the same for your site: update your homepage, highlight the newest pieces, and reorder your product collections. You want it to be an overall experience that reflects your new launch.
If it's summer, make it feel lighter and brighter. Fall/Winter? Moody, cozy, and warm tones work beautifully. It’s all about creating a feeling that pulls your customer in, connects, and makes the whole shopping experience feel exciting.
✦ Content creation
Let your audience know the official launch date & start teasing your new collection a couple week out. Post sneak peeks, use the Instagram “Add Reminder” feature so your followers can set a reminder, and start building excitement. Once you add it to a post you'll be able to also share that event reminder to your stories.
Then, a few days before launch, show almost everything, get your audience ready to shop the second your site goes live.
I think it's good to show people what's coming so they can decide ahead of time what they want to spend their money on!
✦ Packaging supplies
Don’t overlook this! Make sure you have enough mailers, boxes, tissue paper, thank you cards, stickers on hand...whatever you use to pack up your orders. Nothing feels better than being ready to ship when the orders start rolling in!
2. Ready, set, roll it out
✦ Website test
Test everything! Click every link and button, test checkout, make sure promo codes work, and check it all on mobile. If you need to update your navigation menu, or other collections..click through as if you're a customer. Make sure it's super easy for your customers to find what they are looking for.
✦ Social post(s) - Launch day + the next few days
Day 1: Plan a post for launch day (carousel or reel) and get it across all your platforms: IG post, stories, TikTok, Pinterest, even Threads. Meet your customer where they already are.
Day 2: Whichever you didn't do for the first post, do that the next day. You want to mix in a variety of content types. (For example, if you posted a reel on day 1, post a carousel now with 8-10 photos)
Day 3: Try a short carousel with a photo, then a video. Instagram automatically gives you a "second chance" with carousels.. if people don't interact with the first slide, it'll show them the second slide again later.
Day 4: Create another reel that shows the process, uses a voiceover, or something different than your first reel.
If you want to see examples of these types of posts, click here or the photo below and check out my posts from my most recent launch!

✦ Email broadcast
Send your list a launch day email! Give them the details of what's new & why they’ll love it. If you can, include some sort of email exclusive promotion. Make it fun and hype it up. Email is one of the most direct ways to connect and drive traffic, you definitely don’t want to skip it! (and if you want more on building an email list, check out #8 on this list!).
✦ Engage
Hang out in the comments, reply to messages, and encourage interaction! Get social, because that's what it's all about. Ask questions in your captions, check your DMs, and celebrate your launch with your community. Make sure you're really present throughout the launch so people can feel your excitement and energy through the screen!
✦ Show your face :)
If you’re comfortable (or maybe this is your sign to get out of your comfort zone!), post a video on your stories and talk about your launch. Share your excitement, thank your customers, and remind people what’s available! Your audience loves seeing the face behind the brand, and I think it can be a sales booster!
3. Post-launch & Reflection

Deliver a great experience
Package your orders with care and ship them within your promised window. Add branded packaging if possible, it's all about creating that beautiful small-business experience. A handwritten thank you note goes a long way in building return customers!
Tip: Include an incentive for their next purchase with their order. That way, they can save it and use it whenever they want to shop with you again!
✦ Reflect & take notes
After you get all of your orders shipped out, reflect on what worked and what didn’t. Did you give yourself enough prep time? Did you feel like you had enough photos and content? What took longer than you thought it would? Did a certain product sell out faster than expected? Use this info to tweak and refine your next launch!
Feeling ready now?
Launching is a skill & something that takes time to master! And like anything else in business, it gets easier with practice.
The more you do it, the more confident you’ll feel. You’ll start to notice patterns, recognize what resonates with your audience, and build your own rhythm and process that works best for you.
I hope this breakdown gives you a starting point for planning your next (or first!) launch. And if you want a little extra support, I created a free Launch Checklist to help you stay organized and on track with your next launch!
If you like content like this, be sure to join my MADE Makers community, where I'll be touching base weekly with inspiration, crochet patterns, and maker/biz tips to help you on your journey.
Have any launch tips to add? Leave a comment and share what has been working well for you!
Thank you for reading, and I'm cheering you on always!